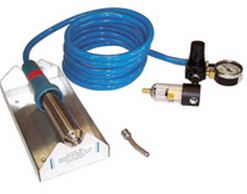
- 1. Remove the screws at the base of the handle.
- 2. Hold the handle in one hand, take the barrel in the other hand and pull to remove the element from the barrel.
- 3. Disconnect element from pin terminals.
- 4. *Check the condition of pin terminals and insulators, and replace them if necessary.
- 5. Connect element to pin terminals; it makes no difference which way.
- 6. Slide insulator over terminals.
- 7. Slip the element back into the barrel until the hole in the handle matches the hole in the inlet adapter.
- 8. Replace handle screws.
*If replacement terminals are necessary, strip wire approx. 1" and fold over, twist tight, insert it into the pin terminals and crimp.

Title: How do you change the elements in the Seelye welders?
Description: Instructions for Changing Elements on the Model # 63 and FC Series Welders
Published: 12/10/2010
Last Edited: 1/4/2023
Information disclaimer:
The information contained in this article is for general information purposes only. The information is provided by
United States Plastic Corp. and while we endeavor to keep the information up to date and correct, we make no representations or
warranties of any kind, express or implied, about the completeness, accuracy, reliability, suitability or availability with
respect to the website or the information, products, services, or related graphics contained on the website for any purpose.
Any reliance you place on such information is therefore strictly at your own risk.
In no event will we be liable for any loss or damage including without limitation, indirect or consequential loss
or damage, or any loss or damage whatsoever arising from loss of materials, time or profits arising out of,
or in connection with, the use of this information.